Installation
I wanted to upgrade my Ansible Automation Platform to RHEL 9, and decided to write a post on how to get this set up in a single node environment.
This AAP install will service my homelab and home servers, so I will be installing it on a fairly small VM. I am going for a conservative 4 cores 8G ram and 80G disk.
Once you have your server installed, you'll need to attach your AAP subscription:
# subscription-manager list --available --all | grep "Ansible Automation Platform"
# subscription-manager attach --pool=<pool_id>
# subscription-manager list --consumed
Next we'll install AAP from the repo:
# dnf install --enablerepo=ansible-automation-platform-2.2-for-rhel-9-x86_64-rpms ansible-automation-platform-installer
# cd /opt/ansible-automation-platform/installer
We'll add our fqdn to /etc/hosts (or add it to your dns if you wish):
# echo "127.0.0.1 tower9.thoatt.com" >> /etc/hosts
Next, adjust the /opt/ansible-automation-platform/installer/inventory file per our environment.
Here is my example for my single node inventory file:
[automationcontroller]
tower9.thoatt.com ansible_connection=local

[database]

[all:vars]
admin_password='<PASSWORD>'

pg_host=''
pg_port=''

pg_database='awx'
pg_username='awx'
pg_password='<PG_PASSWORD>'

registry_url='registry.redhat.io'
registry_username='<registry username>'
registry_password='<registry password>'
Then we'll run the setup with ./setup.sh and wait for it to finish.
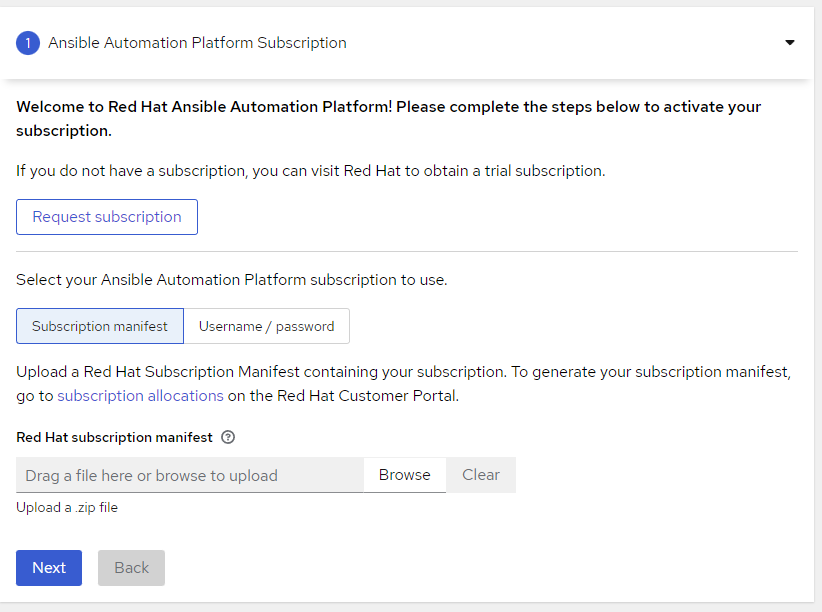
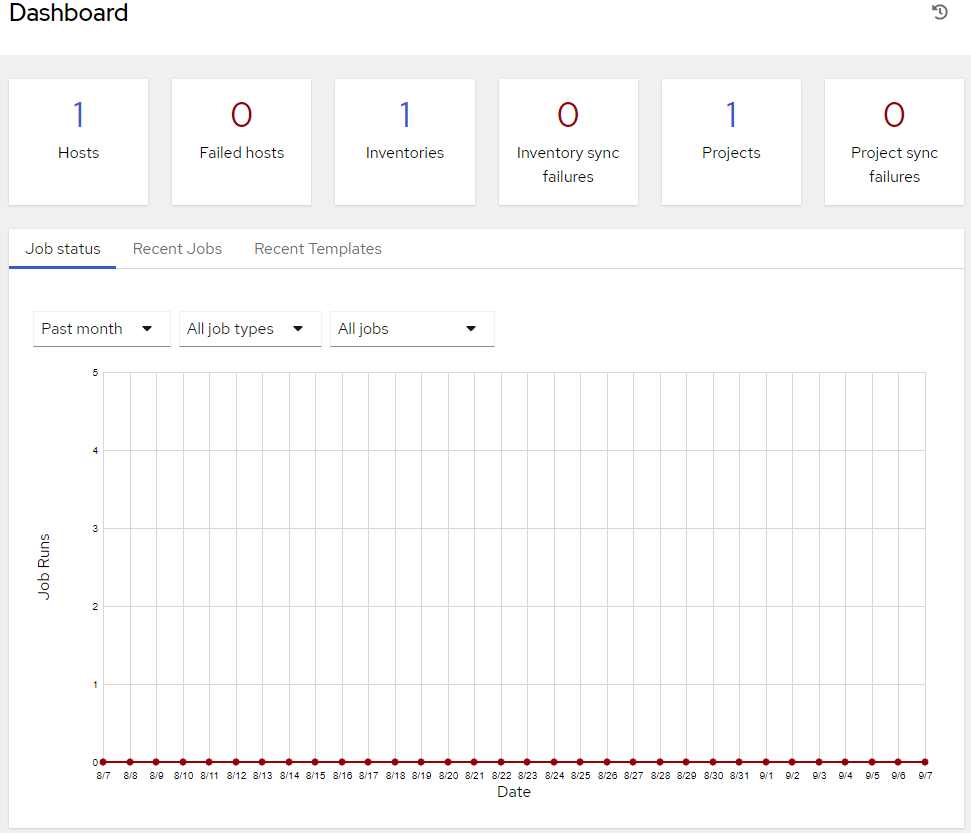
Once the setup is finished, we can open up a web browser to the IP of the server
The default username is admin and the password is the "admin_password" set in the inventory file above.
Configuration
Let's start by creating a new Organization. Go to Organizations and press the Add button. Give it a name and hit Save. I named mine Thoatt and we'll reference this org going forward.
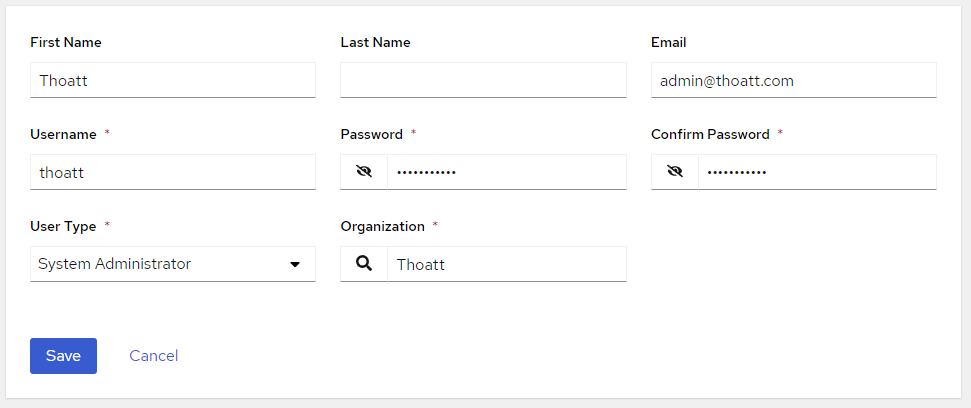
Next up, I'll create a new user. This should be fairly self-explanatory. Head to the Users tab under access, and then Add at the top. Fill out the Username, Password, User Type (System Administrator), and the Organization. I'll use the newly created Thoatt Organization. Click Save. I'll then log out and log into the newly created user.
Once logged into the new user, I will go ahead and delete the default admin user. Check the box next to admin in the Users list, and press Delete at the top.
Next up, I will add a Project. This Project is a simple Git repo with an inventory file and some example playbooks. This is a private Git repo, so first off I'll add credentials to use when adding the project.
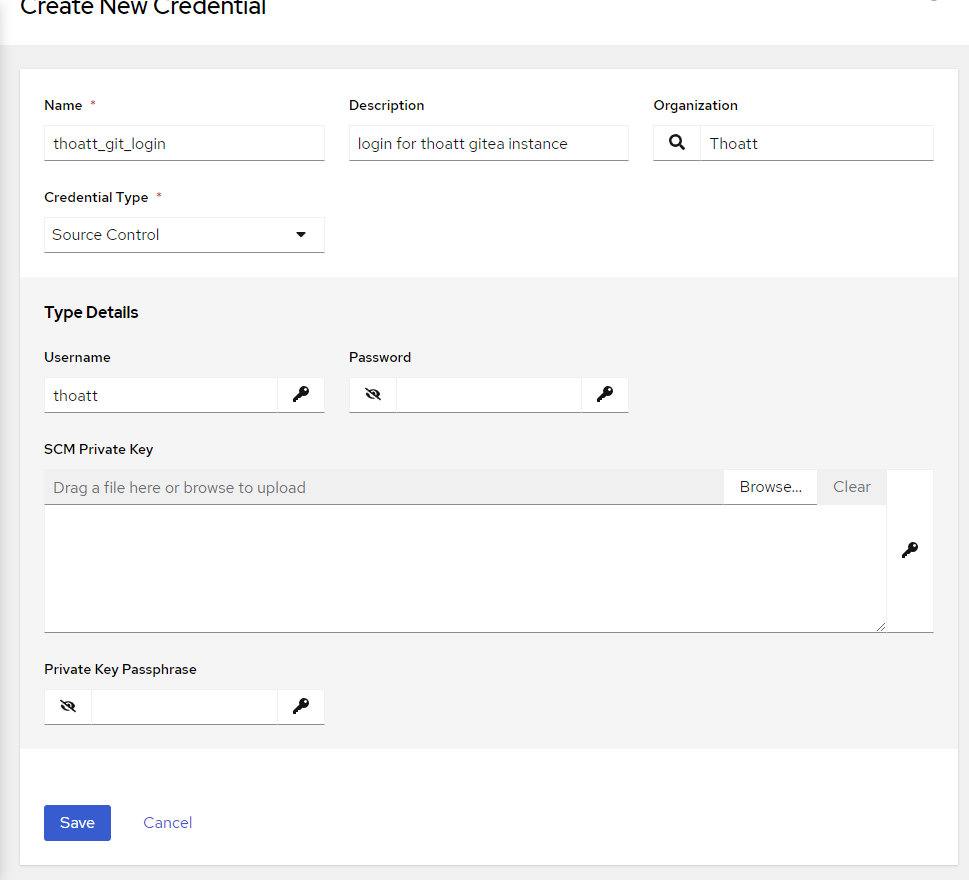
Head to Credentials and press Add at the top. Give it a name, Description, and I'll tie it to the Thoatt org. Credential Type will be Source Control. I'll add my private key to the and press Save.
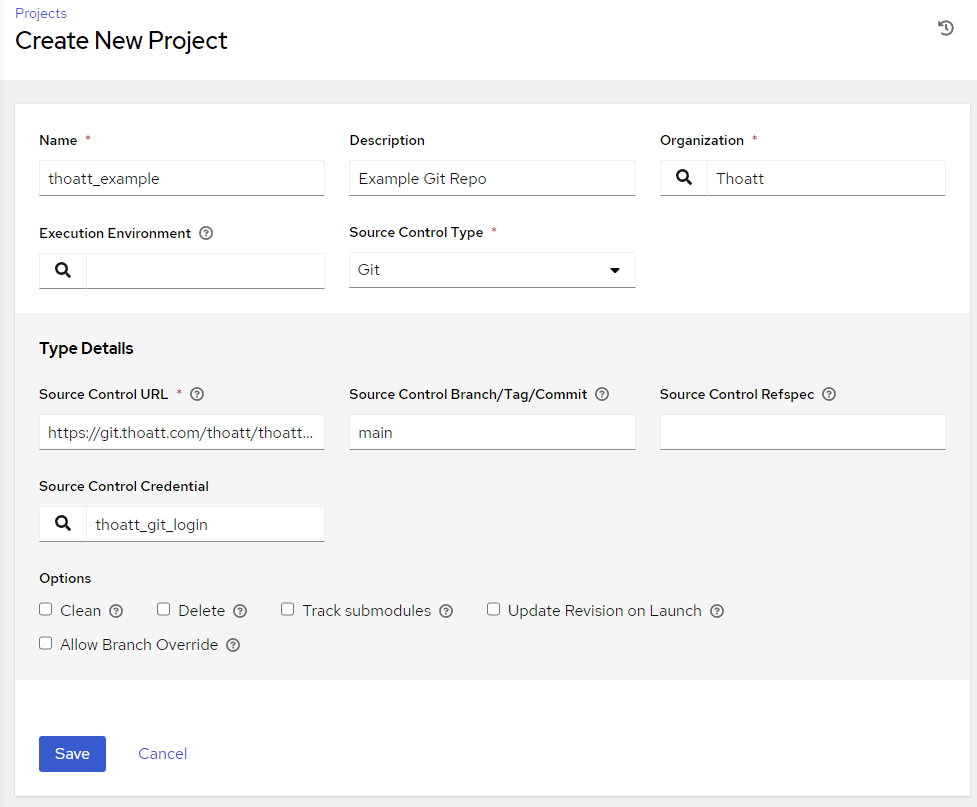
Head to Projects and press Add at the top. Give your Project a name, assign it an organization, and choose Git under Source Control Type
Then add your git repo URL, the Branch you'd like to use, and select your previously created credential for the Source Control Credential.
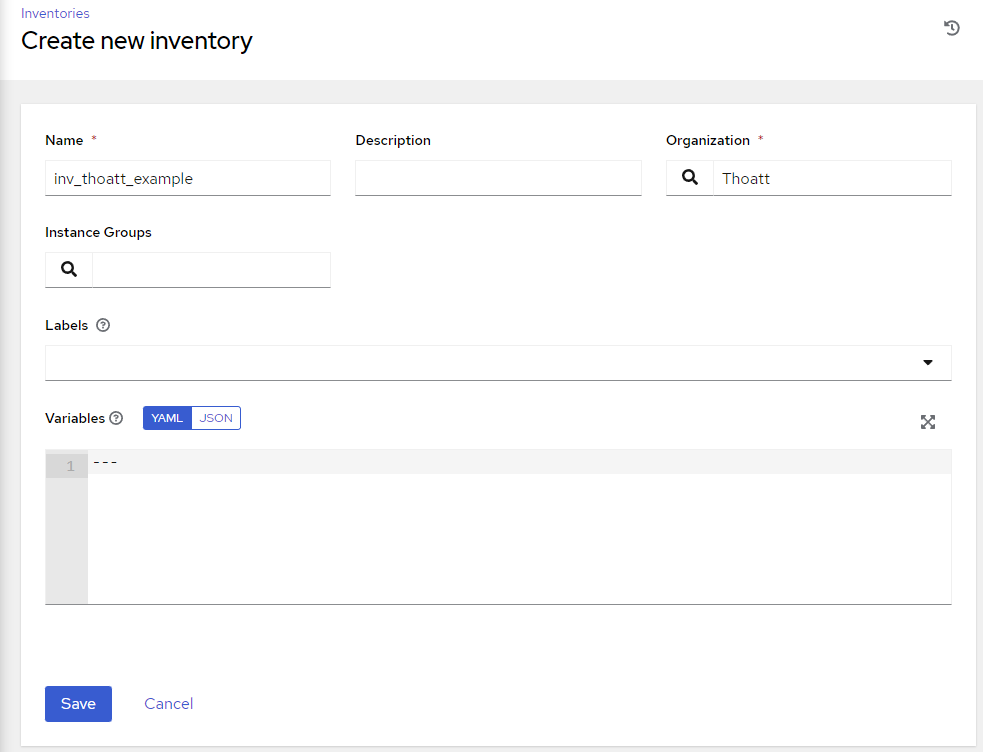
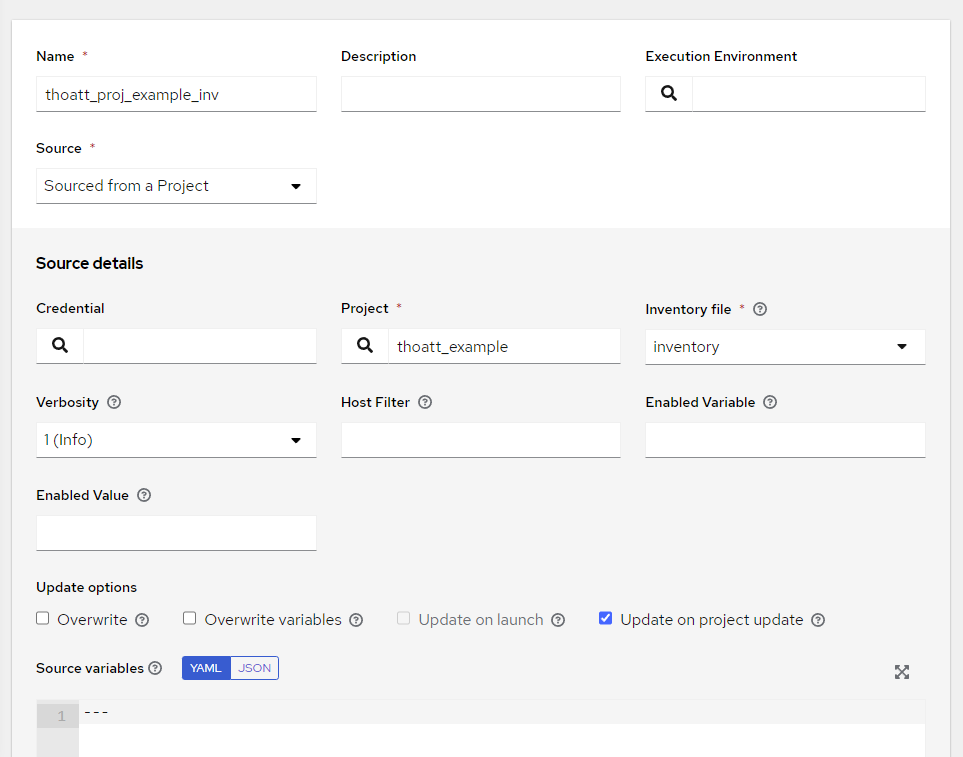
Now that we have our Project files synced, let's add the inventory from the project repo. Head to Inventories and click Add at the top. Select Add Inventory from the drop down. Give the inventory a name and assign it an organization and hit Save. On the Details page, select Sources and then Add at the top.
Give the source a name, and under Source select Sourced from a Project from the drop down menu. Then, select your Project, and select the Inventory file. I will select the Update on project update checkbox as well. Then click Save. Make sure the Last Job Status is Successful, otherwise investigate my clicking on the status.
Confirm that your Groups and Hosts are populated from the inventory file by checking the tabs at the top of the inventory details page.
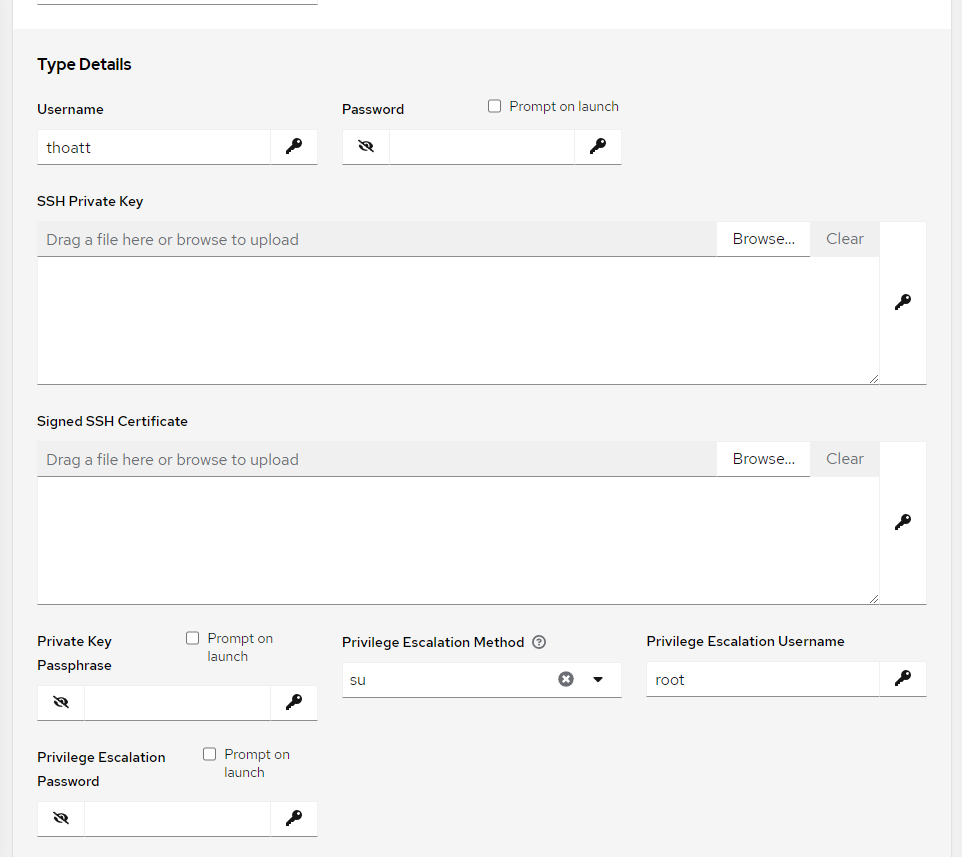
Next let's add a credential to run the playbooks on the servers. Head to Credentials and Add at the top. Give the credential a name, Assign it to an Org if you wish, and for Credential Type select Machine.
All of the machines in my inventory file use the same user and ssh key, so under Type Details I will give a username, and the private key file and Save.
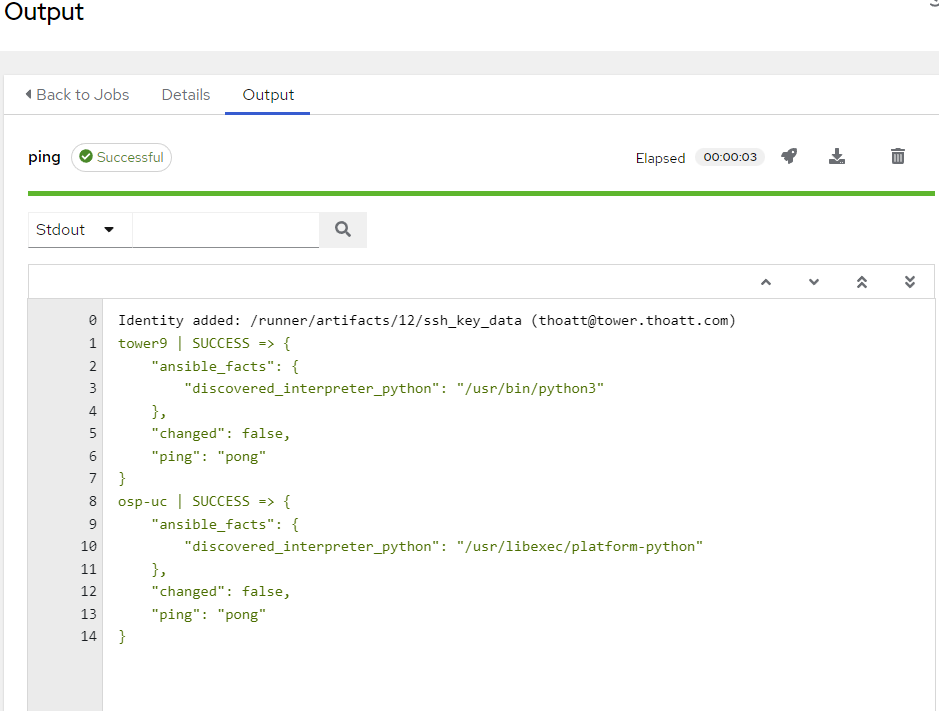
Now that we have a Project and inventories that are updated automatically, let's run a command against the hosts to make sure we have access. Go to Inventories and then open the under the details for the inventory we created, select Hosts at the top. Select the check boxes next to the hosts we want to test, and select Run Command at the top.
I'll use the ping module, and click Next until the Credential screen. Select our ssh key credential, and then Next. We should be all set to launch and watch our output.
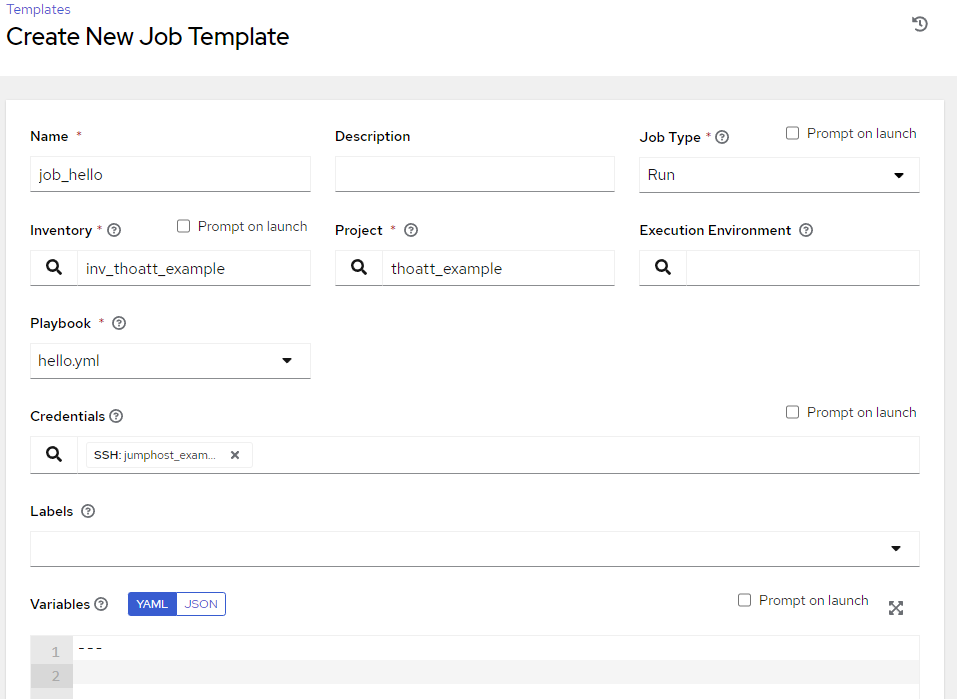
Next up, let's create a new Job Template. Select Templates in the menu, and select Add at the top. Use Add Job Template from the drop down menu. Give the job a name, and select the Inventory and Project. From there, we'll select the playbook we want to run against the inventory. Then, select the ssh key in the Credentials menu. I'll leave all the other options to their defaults and select Save at the bottom.
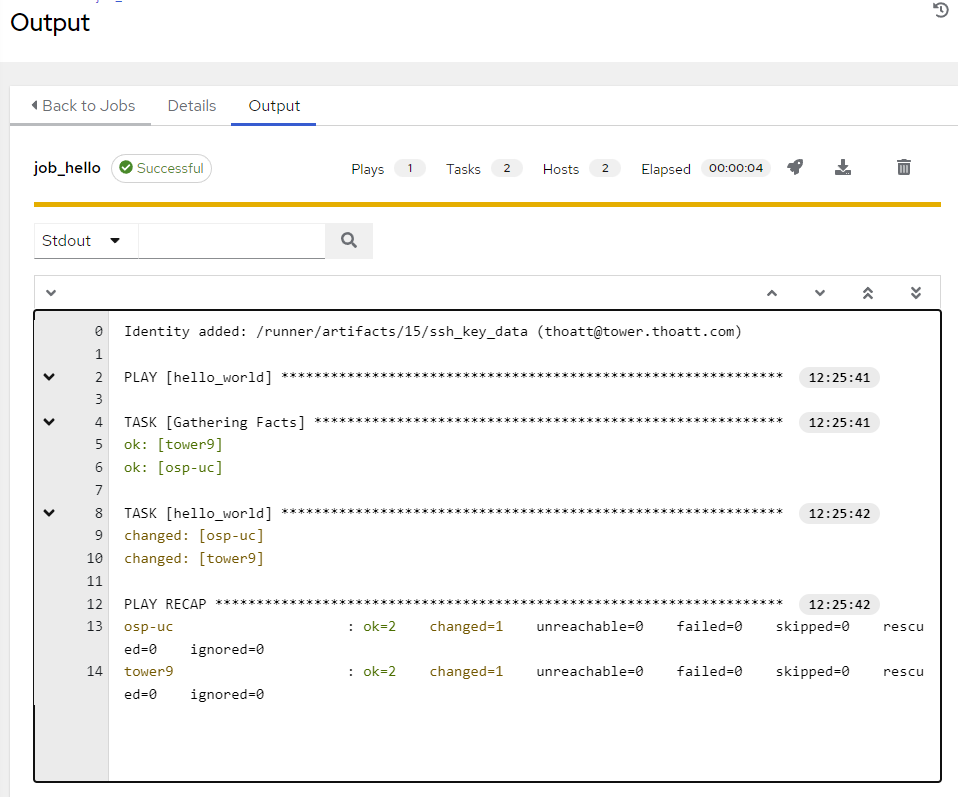
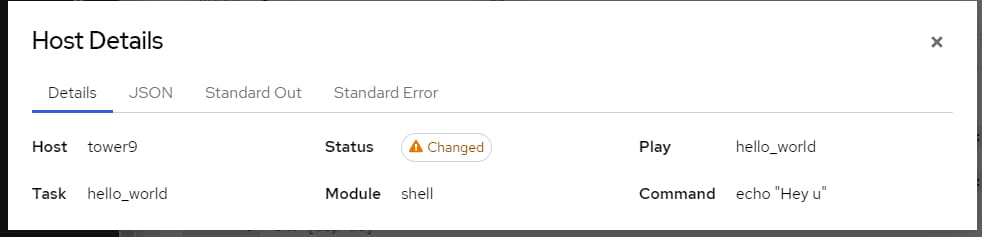
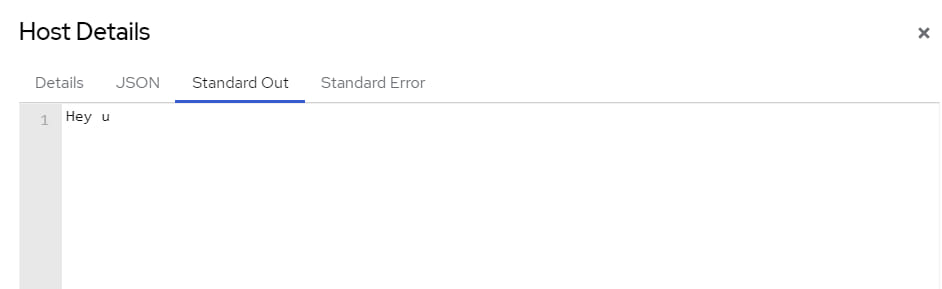
On the details page, let's click Launch to make sure that the job runs without issue. For this playbook, we can click on the changed: [hostname] to see the standard out from the command that we ran.
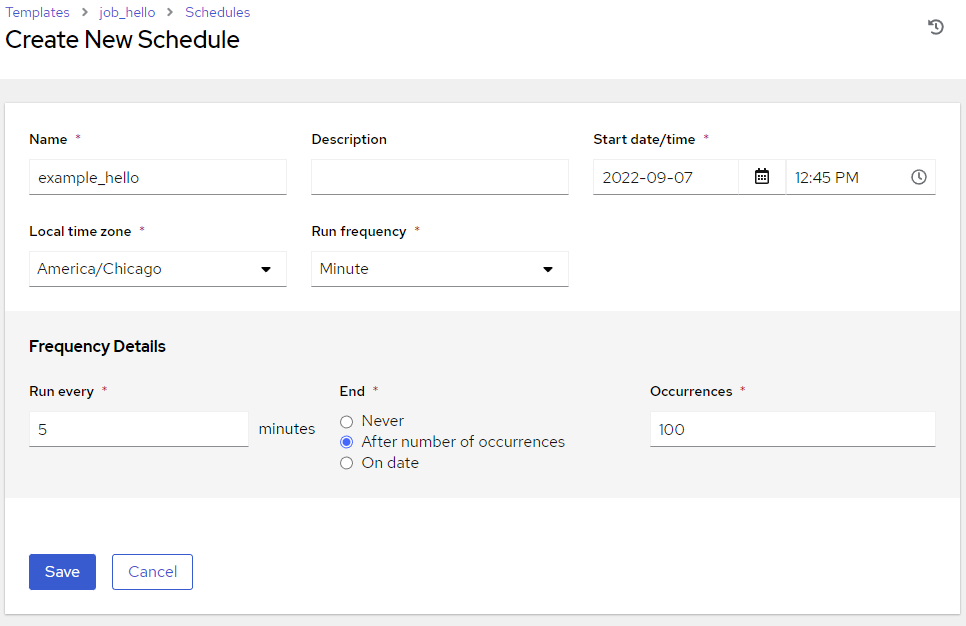
Now that we know the job runs against the inventory, we can set a schedule. Head to Templates, then select our job template we created, and then Schedules at the top. We'll add a job schedule the same way we created the Project schedule. This time, I'll set the job to run every 5 minutes, and stop after 100 runs: